Introduction
I’ll never forget the first time I fired up a table saw. My dad was standing right beside me, reminding me to respect the tool, not fear it. That’s the kind of advice a young boy needs to hear.
Woodworking is one of the most rewarding hobbies I’ve ever picked up, but let’s be real—it comes with risks. Did you know nearly 720,000 woodworking injuries are reported every year? And not surprisingly, the most significant factor is not using the safety guards that come with the equipment.
Here’s the good news: most of those accidents are preventable with the right habits. In this guide, I’ll share 10 woodworking safety tips for beginners I wish I had known when I first started. These aren’t just textbook rules—they come from years of projects, mistakes, and lessons passed down from my dad and uncle James, who was a master carpenter.
So grab your safety glasses, pull up a stool, and let’s talk shop. Because woodworking should be about joy, not trips to urgent care.
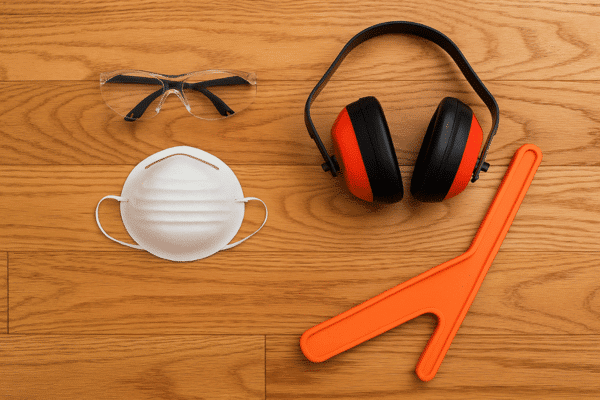
Always Wear Proper Safety Gear
The first time I thought about woodworking safety gear, I assumed it was “extra.” I figured, why bother with hearing protection when I could just tough it out? Big mistake. After a long day running a miter saw, my ears would ring for hours.
I’d brush it off, but deep down, I knew I was paying for my stubbornness. Eventually, I started wearing earmuffs every time, and guess what? No ringing, no headaches, just peace. Besides, modern earmuffs are now equipped with Bluetooth speakers so you can rock out in the shop.
Glasses are another non-negotiable. My high school shop teacher drilled that into me early on. He once told me about a carpenter friend who got a tiny wood chip embedded in his eye because he skipped glasses “just for a quick cut.” So now, even if I’m sanding by hand, I’ve got my safety glasses on. They’re cheap insurance.
Dust masks are trickier. I resisted them at first because I hated the feel, but one day after sanding oak, I coughed for hours. Oak dust isn’t just irritating—it can be toxic. That was my wake-up call. Now I keep a stack of disposable masks handy, and if I’m doing heavy sanding, I use a respirator.
And gloves—well, they’re useful sometimes, but not always. For heavy lifting and finishing, sure. Around spinning blades, though, no thanks. A glove caught in machinery is worse than a bare hand. Knowing when to wear gloves is part of the craft. Rule of thumb: If you’re working with moving parts, don’t wear gloves.
Bottom line: your gear isn’t optional. It’s as much a part of your toolkit as your hammer or chisel. Beginners often overlook this, but trust me—build the habit now. You’ll thank yourself later.
Keep Your Workspace Clean and Organized
If you’ve ever tripped over a piece of scrap wood in the middle of a project, you know why shop organization matters. I still remember one time during a home renovation when I left extension cords, clamps, and offcuts all over the garage floor. I turned around with a 2×4 in my arms, tripped, and went down hard. Luckily, nothing serious happened (and nobody saw me!), but that could’ve been ugly.
In a shop, everything has its place. Like my shop teacher always said, “A clean shop is a safe shop.” And he was right. When I keep my tools racked, cords coiled, and scraps binned, not only do I move safer, but I also work faster. Nothing slows down a project like hunting for a lost tape measure.
Another habit I picked up was sweeping at the end of each session. Sawdust is deceptively dangerous. It’s slippery underfoot, and if it builds up around outlets or sparks, it’s a fire hazard. Plus, breathing it in isn’t great for your lungs. A quick sweep or vacuum at the end of the day saves headaches (and lungs) later.
For beginners, I suggest setting up small systems. A scrap bin near your saw. Pegboard for hand tools. Magnetic strips for drill bits and wrenches. It doesn’t have to look like a Pinterest-perfect workshop; it just needs to be functional.
Think of it this way: your shop is your cockpit. A cluttered cockpit leads to bad landings. An organized one keeps you safe and focused. (Hey, my son’s a pilot)
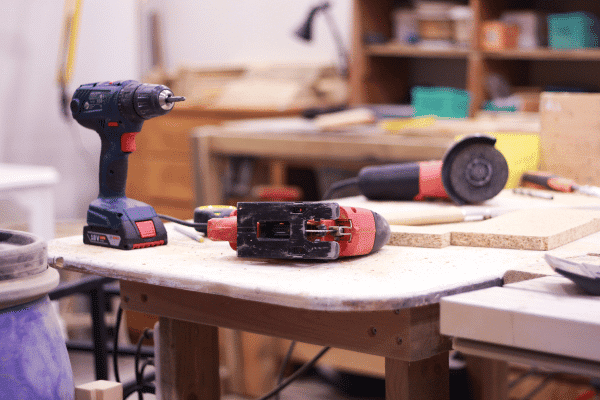
Learn to Respect Every Power Tool
In high school shop class, I learned just how easy it is to misuse tools. A buddy of mine rushed through a cut on the bandsaw, didn’t use a fence, and the blade pinched. Luckily, he only scared himself, but it could have been worse. That day taught me that every tool has its quirks, and if you don’t respect them, they’ll remind you—sometimes painfully.
I was once ripping a board on the table saw when the board kicked back and sent a wooden bullet through the shop. It took a minute for the shakes to calm down. That’s why fences, riving knives, and push sticks matter.
I make it a point now to read manuals. Yeah, it feels boring, but every saw, sander, or drill has little features you won’t know otherwise. Like how some circular saws have guards that stick, or how sanders can clog with dust faster than you think.
For beginners: don’t treat tools like toys, but don’t let fear freeze you either. Start slow, focus on technique, and you’ll build confidence. Respect earns you safety.
Sharp Tools Are Safer Than Dull Ones
One of the first mistakes I made in woodworking was assuming that dull tools were “safer” because they didn’t cut as aggressively. Wrong. Dead wrong. I learned this lesson the hard way with a chisel. I was forcing it into oak, putting my whole body weight behind it, when it slipped off the edge and gouged my finger. Instead of having fun on my project that night, I spent a few hours in Urgent Care.

A sharp tool cuts cleanly. A dull one makes you push harder, wiggle, and fight the material, and that’s when accidents happen. The same goes for table saw blades, router bits, and even sandpaper. Dull sandpaper doesn’t just waste time; it makes you press harder, which can burn wood and strain your wrists.
When I was working at a trim company, I learned the importance of keeping blades sharp. We were hanging custom 8-foot doors, heavy as all get-out. If the circular saw blade wasn’t sharp when trimming the bottoms, the cut would bind, smoke, and sometimes even kick. Our lead carpenter kept a sharpening kit in his truck, and he’d touch up blades on the spot. That’s how serious pros are about sharpness.
For beginners, I recommend investing in a basic sharpening stone for chisels and plane irons. Don’t overthink it. Even a cheap setup can make a dull tool come alive again. For saw blades and router bits, swap them out when you notice burning, chipping, or rough cuts. And here’s a tip: keep a small logbook of when you sharpen or replace tools. You’ll be surprised how much smoother your projects go.
It may feel counterintuitive, but sharp tools are safer, faster, and way more enjoyable to use. Don’t skimp on this.
Always Check Your Wood Before Cutting
Reclaimed wood is a blessing and a curse. I love using it—there’s character in those old boards—but I’ll never forget the time I hit a hidden nail with my table saw. The blade sparked, shrieked, and the wood jumped. My heart about leapt out of my chest. That blade was toast, and I was lucky it didn’t shatter.
Now, every piece of wood I bring into the shop gets a quick inspection. First, I scan it for nails, screws, or staples. Sometimes they hide under paint or old stain. A cheap handheld metal detector is worth its weight in gold here.
When I was renovating houses, we often salvaged trim. Some of it had tiny finishing nails buried in the back, impossible to see at first glance. More than once, I’ve seen guys ruin a miter saw blade by rushing. That’s when I got in the habit of running my hands slowly along the surface, feeling for anything out of place.
Beginners often overlook this step because they’re eager to start cutting. But checking your wood takes just a minute and can save tools, money, and maybe even your fingers. If you’re not sure about a board, don’t risk it. Set it aside or cut it down with a hand saw first. Wood is cheap. Your safety isn’t.
Use Push Sticks and Jigs for Extra Safety
Early on, I used to think push sticks were for people who didn’t know what they were doing. I was young, cocky, and thought, “I’ll just keep my hands clear.” Then came the day I was ripping a narrow strip on the table saw. My hand slipped just a little too close to the blade, and I froze mid-cut. The board caught, chattered, and I backed off shaking (yep, a different incident). From that day forward, push sticks became my best friends.
Push sticks keep your hands away from the danger zone, plain and simple. Even better, they give you more control over the workpiece. With a push block or featherboard, your cuts are cleaner, straighter, and safer. It’s like having an extra hand.
I’ve made my own push sticks out of scrap plywood. You can get decent push blocks online, but a homemade version works just as well. I even cut different shapes for different tools—long skinny ones for ripping on the table saw, wider blocks with handles for the jointer. And when they get worn down, I don’t feel bad tossing them because they’re just scraps.
Jigs are another lifesaver. A crosscut sled for your table saw, for example, not only makes your cuts more accurate but also keeps your hands further from the blade. Same goes for taper jigs, drill press guides, and router templates.
If you’re a beginner, start with a couple of simple push sticks and work your way up. It might feel slow at first, but over time you’ll realize it’s faster to use them than to deal with ruined cuts—or worse, injured fingers.
Never Rush Through a Project
Woodworking rewards patience. Every time I’ve slowed down, my projects turned out better. Every time I’ve rushed, I’ve regretted it. It’s not just about aesthetics; it’s about safety. A rushed cut is a crooked cut, and crooked cuts bind in saws, slip on jointers, or cause chisels to skid.
When I built my oak display cabinet back in high school shop class, I remember sanding one of the glass shelves’ supports. I got impatient and tried to force the finish, skipping grits of sandpaper. The result was uneven and ugly. My teacher made me redo the whole thing. At the time, I was frustrated. Looking back, it taught me that shortcuts rarely save time in woodworking.
If you’re just starting out, set small, achievable goals for each shop session. Don’t plan to build a whole table in one day. Maybe just cut the legs today, assemble tomorrow. Break big projects into steps and give yourself permission to take breaks.
Woodworking isn’t a race. The joy is in the process. Slow down and let the project teach you.
Respect Dust and Ventilation
When I was younger, I thought sawdust was just an annoying byproduct. You sweep it up, blow it off with a compressor, and move on. What I didn’t realize was that dust is one of the biggest hidden dangers in a woodshop. I learned that the hard way when I spent an afternoon sanding oak without a mask. By evening, my throat was raw, I couldn’t stop coughing, and I had a pounding headache. That was my wake-up call.
Wood dust isn’t just irritating; it can actually be toxic, especially from hardwoods like walnut or exotic species. Long-term exposure has been linked to asthma and other serious health issues.
The first upgrade I made in my shop was a simple shop vacuum hooked up to my tools. Even that made a huge difference. Later, I invested in a small dust collector with a 4-inch hose, and suddenly the air felt cleaner, and I wasn’t tracking piles of sawdust all over the garage.
For beginners, here’s my advice: start small. At the very least, wear a dust mask or respirator when sanding, routing, or cutting. If you can, set up a box fan with a furnace filter taped to the back—it’s a cheap way to clean airborne dust. And always, always work with decent ventilation. Open a window, run a fan, or step outside for dusty tasks.
Sawdust may not seem as dramatic as a spinning blade, but trust me, it’s just as dangerous in the long run. Protect your lungs—you only get one set.
Know Basic First Aid and Emergency Prep
Here’s something most beginners don’t think about: what’s your plan if something goes wrong? When I first started woodworking, I never gave it a second thought. But then came the day I drove a splinter the size of a toothpick under my fingernail. It swelled, got infected, and turned into a painful week-long reminder that I wasn’t prepared.
After that, I built a basic first aid kit for my shop. Bandages, antiseptic wipes, tweezers for splinters, and even a small eye-wash bottle. Nothing fancy, but it’s saved me countless trips to the bathroom mid-project. And let’s be honest—time is everything when something goes wrong.
Fire safety is another thing that doesn’t get enough attention. Sawdust is combustible. Add a spark from a grinder or an extension cord shorting out, and you’ve got a recipe for disaster. Keep a small fire extinguisher mounted by the door. It’s cheap insurance.
Another smart habit? Keep your phone nearby. Seconds matter in an emergency. Keep your phone charged and within reach, especially if you work alone.
Beginners should also think about shop layout. Make sure there’s a clear path to the exit—no cords or boards blocking your way. I like to pretend I have 10 seconds to get out of the shop. Could I do it safely? If not, I rearrange.
First aid and prep aren’t exciting, but they might just save your life.
Learn From Mistakes and Keep Improving
I’ll be real with you—when I first started woodworking, I was a perfectionist. I thought every cut had to be flawless, every joint tight, and every finish smooth as glass. And when I inevitably messed up, I beat myself up. Over time, I learned something important: mistakes are part of the craft.
Take my aquarium stand, for example. I stained it way too dark, and the grain looked like tiger stripes. I hated it. But instead of scrapping it, I lived with it. That mistake taught me that sometimes the best finish is no stain at all—just a clear coat to let the wood speak for itself. Lesson learned.
When I was working as a superintendent, I oversaw hundreds of homes being built. Every day, problems came up—crooked studs, warped doors, plumbing leaks. Instead of getting angry, I realized that each mistake was just a puzzle to solve. That mindset transferred to my woodworking. Now, when I mess up a cut, I don’t panic. I look at it as an opportunity to fix, adapt, or redesign.
For beginners, here’s a tip: keep a woodworking journal. Jot down what went well, what went wrong, and what you’d do differently next time. Over the years, those notes become gold. They turn into your personal instruction manual, written in your own voice.
At the end of the day, woodworking isn’t about being perfect—it’s about learning, creating, and improving. Every mistake is a stepping stone toward mastery.
Conclusion
Woodworking has been one of the most rewarding parts of my life. It’s creative, hands-on, and endlessly challenging. But none of it matters if you don’t make safety a priority. From wearing gear to keeping your shop clean, from respecting tools to learning from mistakes—these woodworking safety tips for beginners are the foundation of a safe, enjoyable hobby.
Remember this: slow down, respect the craft, and don’t pressure yourself to be perfect. Over time, good habits become second nature, and your projects will not only look better but feel safer to build.
So the next time you walk into your shop, put on those safety glasses, take a deep breath, and enjoy the process. After all, woodworking is supposed to bring joy—not accidents.
FAQs:
Q: What are the most important woodworking safety tips for beginners?
A: Always wear safety gear, keep your workspace organized, respect tools, use push sticks, never rush, and check wood for hidden objects before cutting.
Q: Why are push sticks important in woodworking?
A: Push sticks keep your hands a safe distance from blades on table saws, reducing the risk of severe injuries.
Q: Is it safer to use sharp or dull tools in woodworking?
A: Sharp tools are safer because they cut smoothly, while dull tools require more force and can slip, leading to accidents.
Q: How do I protect my lungs from wood dust?
A: Wear a dust mask or respirator, use a shop vacuum or dust collector, and work in a well-ventilated space.
Q: Should beginners learn woodworking safety before building projects?
A: Yes. Learning safety first prevents accidents, builds confidence, and makes woodworking more enjoyable in the long run.