Introduction
I still remember the first time I tried to build something on my own—I must have been about 8, standing in the garage with my dad, staring at a pile of pine boards. I thought I was about to craft a masterpiece. Spoiler: It was a lamp for my 4H project, and it barely held together. But here’s the thing—that shaky little lamp was my starting line.
Woodworking can look intimidating when you see fancy dovetail joints or $2,000 cabinet saws, but here’s the truth: you don’t need to be a pro to make something beautiful and useful. With just a few simple tools and some confidence, you can knock out easy woodworking projects for beginners that will leave you thinking, “Hey, I actually built this!” That’s what this guide is all about.
In this article, I’ll walk you through beginner-friendly woodworking projects that are affordable, practical, and a whole lot of fun. Along the way, I’ll share some of my own wins (and epic fails) to keep things real. Ready to make some sawdust? Let’s dive in.
Why Start with Easy Woodworking Projects?
When I took my first woodworking shop course in high school, our teacher told us: “Don’t run before you can walk with a saw.” At the time, I laughed, but he was right. Beginners often set their sights on something massive—like a dining room table—only to get discouraged halfway through. That’s why starting with easy woodworking projects makes sense.
I remember building my first cutting board. Simple as it was, I learned how wood glue worked (and how much of a mess it can make when you smear too much on). I also learned patience, waiting for clamps to do their job overnight. These small lessons carried over into every bigger project I did later—bookcases, doors, even full renovations.
When you finish your first project, you feel a rush of pride. And honestly, you’ll want to show it off even if the corners don’t line up perfectly. Trust me, no one cares about the tiny flaws as much as you do. What matters is that you made something with your own two hands. That sense of accomplishment fuels the desire to try more.
Another huge benefit is cost. Easy projects don’t usually require exotic lumber or pricey specialty tools. You can start with a circular saw, drill, sander, and some pine boards from the home center. If you mess up? No big deal—it’s cheap material, and the learning experience is worth every penny.
Bottom line: easy woodworking projects aren’t just about saving time—they’re about building the foundation for everything else you’ll do in woodworking.
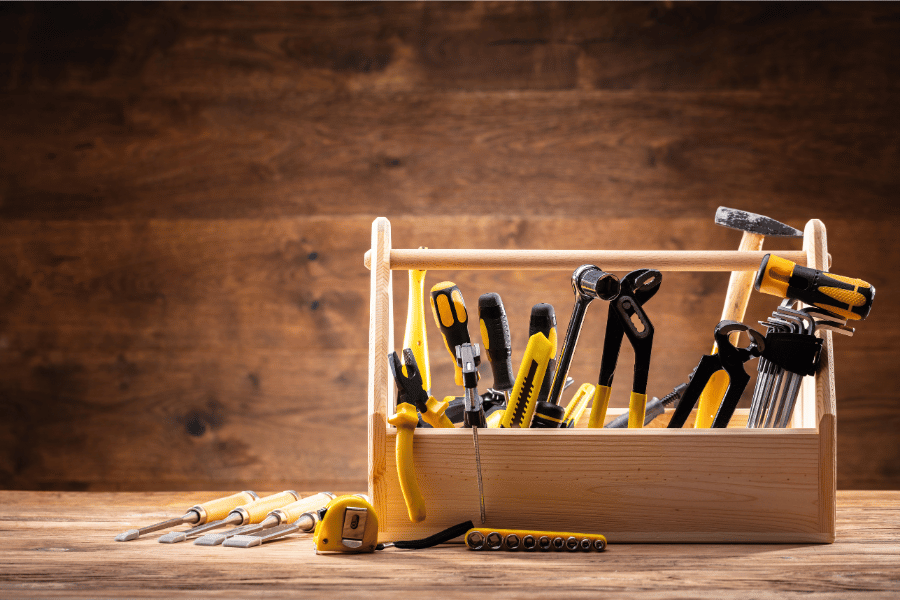
Essential Tools for Beginner Woodworking Projects
When I first started restoring old furniture, I thought I needed every tool under the sun. Wrong. What I really needed was to master just a handful of essential tools. My shop teacher always said, “It’s not about how many tools you own, it’s about knowing how to use the ones you’ve got.”
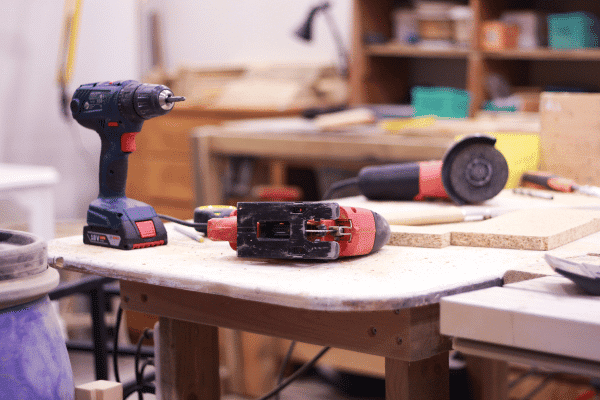
If you’re starting with easy woodworking projects for beginners, a circular saw will probably be your workhorse. I used mine to cut everything from plywood shelves to garden planters. It’s versatile, portable, and a lot less intimidating than a table saw.
A cordless drill is next. Not only does it drive screws, but with the right bit, you can pre-drill holes, stir paint, or even sand in a pinch. My first drill was a beat-up hand-me-down, but it got me through years of projects.
Don’t underestimate clamps, either. My high school project—a hexagonal display cabinet—taught me that glue is useless without proper clamping pressure. A couple of attempts ended up with gaps big enough to slip a quarter through. Lesson learned: the right clamps are as important as the glue itself.
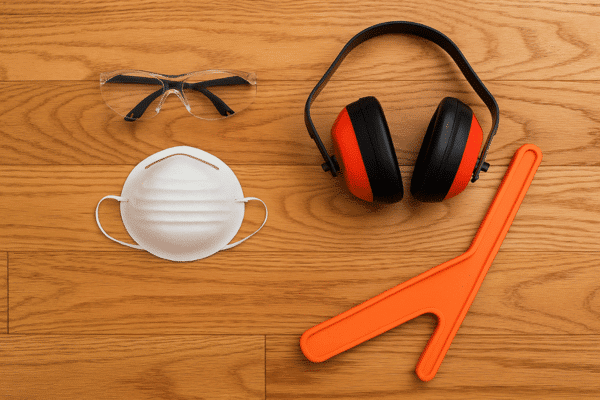
Of course, safety gear is a must. I’ve seen what happens when people “just make a quick cut” without goggles—sawdust in the eye isn’t fun. Keep yourself safe so you can enjoy the process long-term.
12 Easy Woodworking Projects for Beginners (Step-by-Step)
Here are a few simple projects that can help build the skills you’ll use for your whole woodworking journey.
1. Simple Cutting Board
Quick Steps:
- Select hardwood boards (maple, walnut, or cherry).
- Cut to equal length.
- Glue edges together, clamp overnight.
- Sand smooth with coarse → fine grits.
- Round edges for comfort.
- Apply food-safe mineral oil or conditioner.

The cutting board is like the “gateway project” for woodworking beginners. One of my very first solo projects in high school shop class was a cutting board, and I’ll admit, I rushed it. I glued the boards together with so much glue that it oozed everywhere. I didn’t wipe the glue off before it dried, so it took hours to clean and sand the excess glue from the surface. That sucked.
The beauty of a cutting board is that it teaches you several essential skills at once—measuring, cutting, gluing, clamping, sanding, and finishing. You don’t even need complicated tools. A handsaw or circular saw, wood glue, some clamps, and sandpaper will get the job done. I recommend using hardwoods like maple, walnut, or cherry because they’re durable and food-safe. Avoid softwoods like pine—they’ll get scarred up in no time.
Cut the boards to the length you want. It’s best to lay the pieces out like you’re planning to assemble the board. This will help you see the project before anything permanent happens. When you’re happy with the layout, apply wood glue liberally between the boards and clamp them snug. Check to make sure your boards are seated even and that the glue fills the gaps fully.
Wait about 10 minutes and then use a wet rag to wipe the excess glue from the surface. This will keep you from learning my lesson and sanding for hours longer than necessary. Next, I suggest you wait for a couple of hours till the glue has set up permanently.
Now it’s time to sand. Start with 80-grit sandpaper and sand the entire surface until smooth. Don’t forget the sides. Then proceed to 120-grit and finally to 220-grit sandpaper. Your board should feel very smooth then.
A pro tip: Don’t skip the step of applying mineral oil or a cutting board conditioner at the end—it protects the wood and keeps it looking fresh.
This project will give you something useful, functional, and gift-worthy. Plus, when you finish sanding and finally run your hand over the silky-smooth surface, you’ll feel like a real woodworker.
2. Rustic Wooden Coasters
Quick Steps:
- Gather small wood scraps (3.5–4 in. squares).
- Cut pieces to uniform size.
- Sand all sides until smooth.
- Add optional design: burn, carve, or paint.
- Seal with polyurethane or epoxy resin.
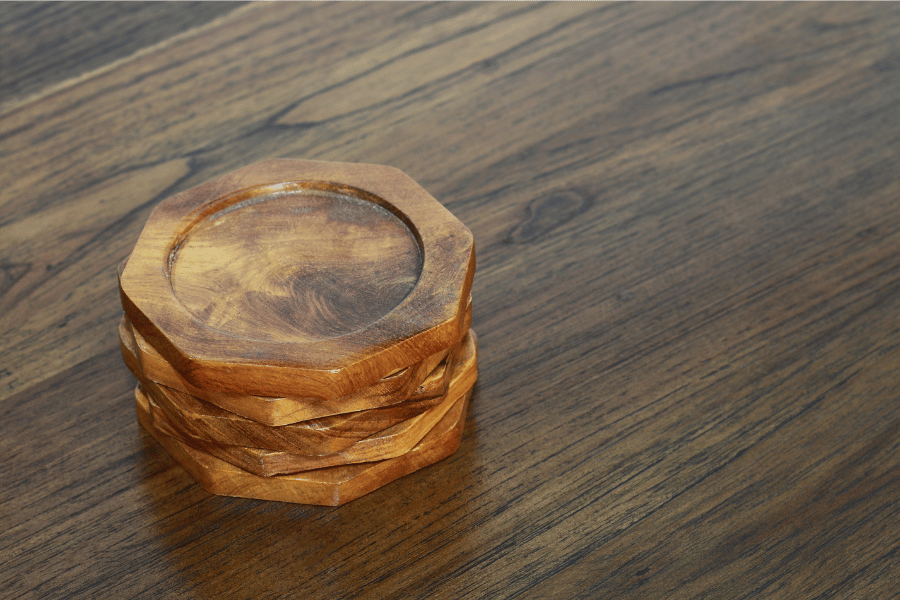
If you’ve got scrap wood lying around, coasters are the ultimate “scrap-buster” project. Back when I was restoring furniture, I always had odd little offcuts—pieces too small for shelves but too pretty to throw away. Turning them into coasters not only saved the wood from the trash pile but gave me something fun to hand out as gifts.
You’ll also get to experiment with finishes—clear coats, stains, or even epoxy resin. One mistake I made was applying a heavy stain to oak coasters; the grain got so dark that you couldn’t see the natural beauty anymore. Lesson learned: sometimes clear finishes are best.
The fun part? You can personalize coasters by carving initials, burning designs with a wood burner, or even painting patterns. I once made a set shaped like Arizona for a friend—it wasn’t perfect, but they loved it.
3. Floating Shelf
Quick Steps:
- Cut board to desired length.
- Sand edges and apply finish (stain/paint).
- Locate studs in wall with a stud finder.
- Install hidden brackets or L-brackets.
- Slide or mount shelf onto brackets securely.
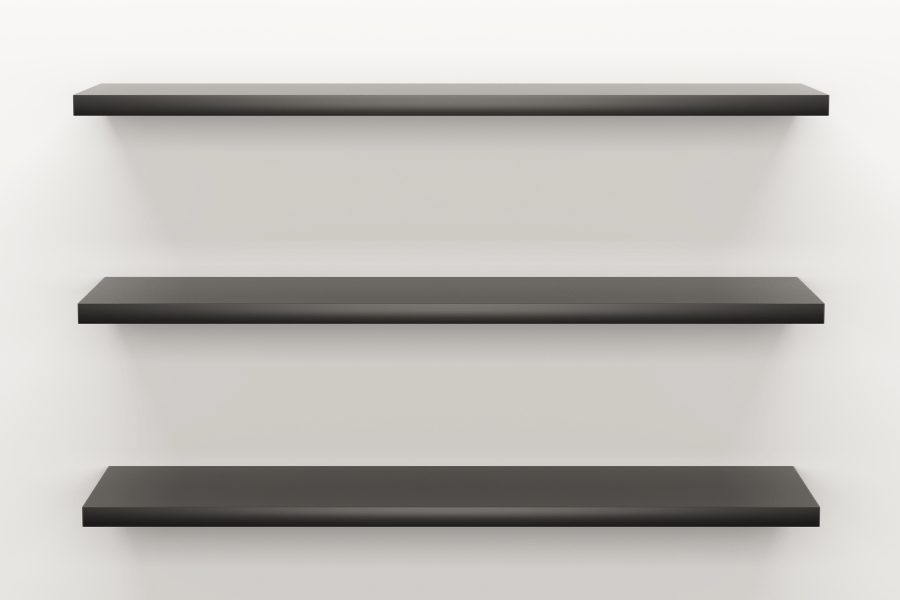
Floating shelves are perfect for beginners who want to learn about wall-mounting and basic joinery. Your shelf can be thin if you want to use supports under them. But if you want hidden brackets, you’ll need a thicker shelf (@ 1 inch). You can pick up hidden shelf brackets from a box store or from Amazon.
The trick is in the prep. Measure carefully, use a level, and always drill into studs if possible. If you can’t, heavy-duty wall anchors will save you. You’ll also practice sanding edges smooth and applying a finish that matches your room’s décor.
Floating shelves give you instant gratification. Put one up in your living room, place a plant on it, and boom—you’ve transformed the space with your own hands.
4. Wooden Toolbox
Quick Steps:
- Cut bottom panel, two side panels, and ends.
- Attach pieces with screws or nails.
- Drill holes in sides for a dowel handle.
- Insert handle and secure.
- Sand edges and finish with paint or oil.
This project introduces you to box construction and reinforcement. You’ll learn to keep things square, add strength with screws, and design something portable. Plus, it’s the kind of project that grows with you. You might start with a basic open-top box and later add compartments or dividers for different tools.
Cut the bottom panel and the two sides to the length you want your toolbox to be. These will butt up to the two end pieces. You can make these end pieces however you like. Just make sure they’re the same width as your bottom panel.
After sanding all your pieces, glue your side pieces to the bottom panel. You’ll end up with something like a trough. Then glue the end pieces to each end of your trough. Make sure to glue that dowel handle in at the same time.
After a few minutes, carefully wipe the excess glue away. When it’s fully dry, touch up any necessary sanding and paint it or apply a clear coat.
5. Birdhouse
Quick Steps:
- Cut front, back, sides, floor, and roof panels.
- Drill entrance hole (1–1.5 in. depending on bird type).
- Assemble panels with screws or nails.
- Attach roof with hinges or screws.
- Finish with exterior-safe paint or sealant.

Ah, the classic birdhouse. This project teaches cutting angles, drilling holes, and assembly with screws or nails. You’ll also practice weatherproofing if you plan to hang it outside. Cedar is my go-to wood for birdhouses since it naturally resists rot.
A fun variation is to design the birdhouse with your kids or grandkids. Let them choose the paint colors and help sand the edges. Even if the final product is crooked, it will become a memory piece more than just a project.
Cut your side pieces to the height you want. When cutting your front and back pieces, make sure the bottom of the gable matches the height of your side pieces. The bottom piece can be larger than the footprint of the house, like in the picture here.
If you choose to miter the roof pieces at the ridge, the two roof pieces need to match each other. If you prefer to skip the miter, you can make one piece longer than the other by the thickness of the roof pieces. For instance, if your roof pieces are 3/4″ thick, make one roof piece 3/4″ longer than the other. Then glue them together where the longer piece becomes the ridge. This will make the roof symmetrical on both sides. Trust me–it’ll work.
If you’re feeling fancy, you can glue one side of the roof down and use hinges to allow the other side to swing open. This will give you access to the inside of the birdhouse.
Don’t forget to drill the hole and install a dowel rod roosting peg (I made that up. I’m not sure what that dowel is called).
6. Planter Box
Quick Steps:
- Cut four side panels and a bottom panel.
- Assemble box with exterior screws.
- Drill drainage holes in the bottom.
- Sand corners smooth.
- Apply exterior finish or paint.
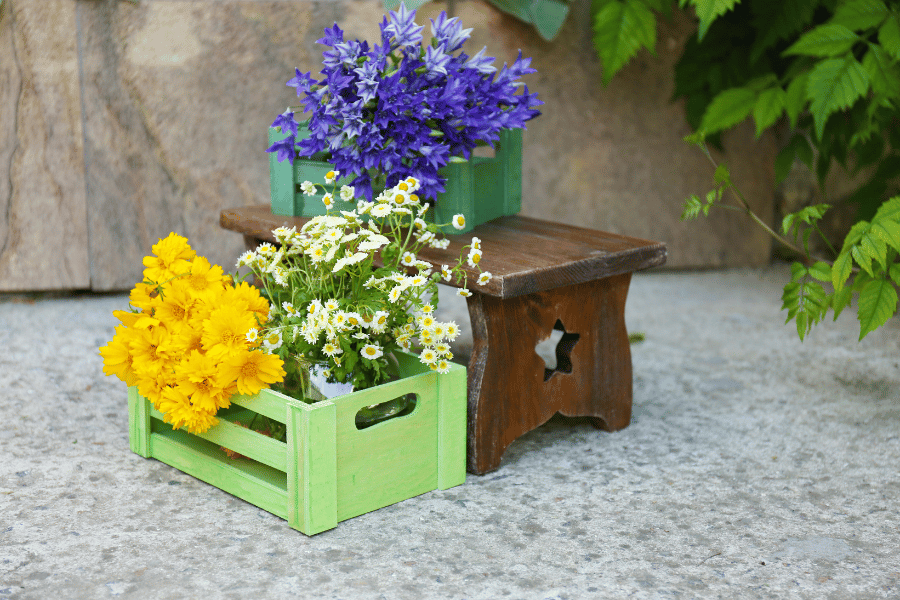
When I was flipping houses, we often built planter boxes to spruce up the curb appeal. They were cheap, quick, and instantly made a home look welcoming. That’s the beauty of this project—it’s beginner-friendly but has a huge impact.
Planter boxes teach you how to cut longer pieces, join corners, and use screws for strength. You’ll also learn about outdoor finishes—spar urethane or exterior paint will protect your work from the weather.
Your long pieces (front, back, and bottom) need to fit your window space (if you’re installing these on a windowsill). The side pieces can be any size you want your box to be. Keep in mind that most plant pots are at least 4″ in diameter, so have that clearance inside.
Screw you front & back pieces to the bottom panel. Then screw the end pieces on. Easy peasy.
One tip: drill drainage holes in the bottom. My first planter box didn’t have them, and the poor flowers drowned after a rainstorm. Small details like that matter, and you’ll only learn by trying.
7. Basic Workbench
Quick Steps:
- Cut 2×4 legs and cross supports.
- Assemble a sturdy rectangular frame.
- Attach top panel (plywood or MDF).
- Add lower shelf for storage (optional).
- Sand edges and check for level.

Every woodworker eventually needs a workbench, and building your own is a rite of passage. My first one was just 2x4s screwed together with a sheet of plywood on top. It wasn’t pretty, but it gave me a sturdy surface for projects.
This project is a little bigger, but it teaches crucial lessons: leveling legs, reinforcing corners, and designing for durability. It also sets you up for success—you’ll have a dedicated space to build all your future projects.
I recommend adding a shelf underneath for storage. My second workbench had one, and it made a world of difference for keeping tools organized.
Cut the four legs to length (you decide how high). Cut 2 x 4 braces to connect the legs. These can be straight across, or you can angle them if you feel confident. Screw them together. Attach 2 x 4 runners across the top of the legs. This will give your top something to attach to.
Screw your plywood top to the runners. Sand all the edges and check for levelness. If your table wobbles, you can find the high spot (the longer leg) and sand it slightly, and check again. Eventually, you’ll get the table to sit flat.
8. Picture Frame
Quick Steps:
- Measure artwork/photo dimensions.
- Cut four pieces at 45° miters.
- Glue and clamp corners (or use a strap clamp).
- Add backing board and glass.
- Attach hanging hardware.
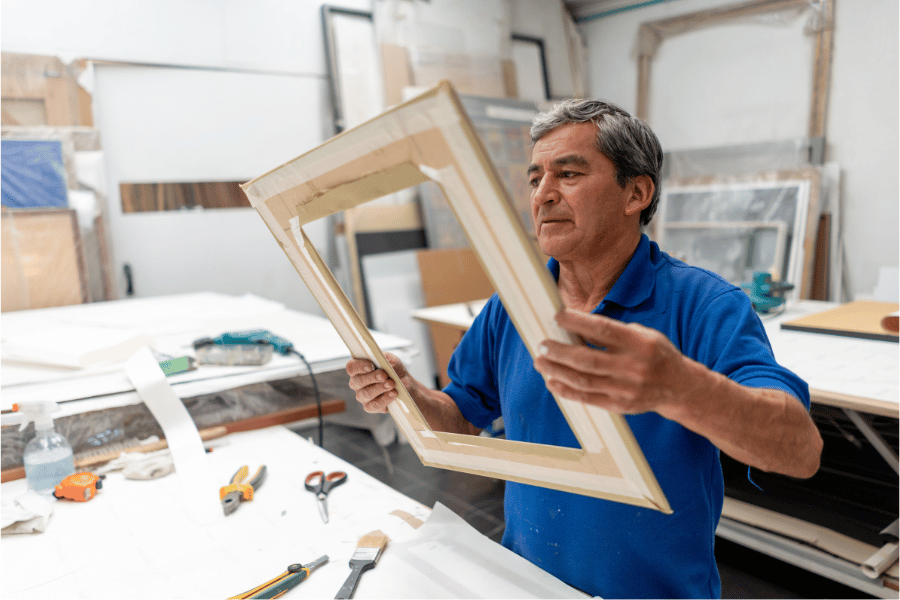
Making a picture frame might sound simple, but it’s a real test of accuracy. Those 45-degree cuts on the corners need to be precise or you’ll end up with ugly gaps.
But that’s why it’s such a good beginner project. You’ll learn to measure carefully, cut miters, and clamp pieces evenly. Plus, it gives you a great way to display family photos, art, or even your own woodworking projects.
Pro tip: use a strap clamp for frames. It applies even pressure on all four corners at once. I wish I had known that sooner—it would’ve saved me a lot of headaches.
9. Wooden Serving Tray
Quick Steps:
- Cut bottom panel and side rails.
- Attach rails with glue and screws.
- Drill holes for handles or attach metal ones.
- Sand all surfaces smooth.
- Finish with food-safe oil or clear coat.

This project is functional, fun, and teaches you how to add hardware like handles. I made my first tray out of leftover oak flooring, and it turned out surprisingly well.
Cut your bottom board (or boards) to length (whatever you prefer). Cut the sideboards to fit your bottom panel perimeter. Make sure to drill the handles if you’re going with that style. You’ll want to sand all your boards before assembly.
Glue and screw them together. After drying, look over your work for any sanding touch-ups. Finishing is especially important here since trays see a lot of spills. I recommend food-safe finishes like tung oil.
Adding handles is a small step, but it introduces you to working with hardware—a skill you’ll use again and again.
10. Wall-Mounted Coat Rack
Quick Steps:
- Cut board to desired length.
- Sand and finish with paint or stain.
- Mark evenly spaced hook positions.
- Attach hooks with screws.
- Mount rack into studs or wall anchors.
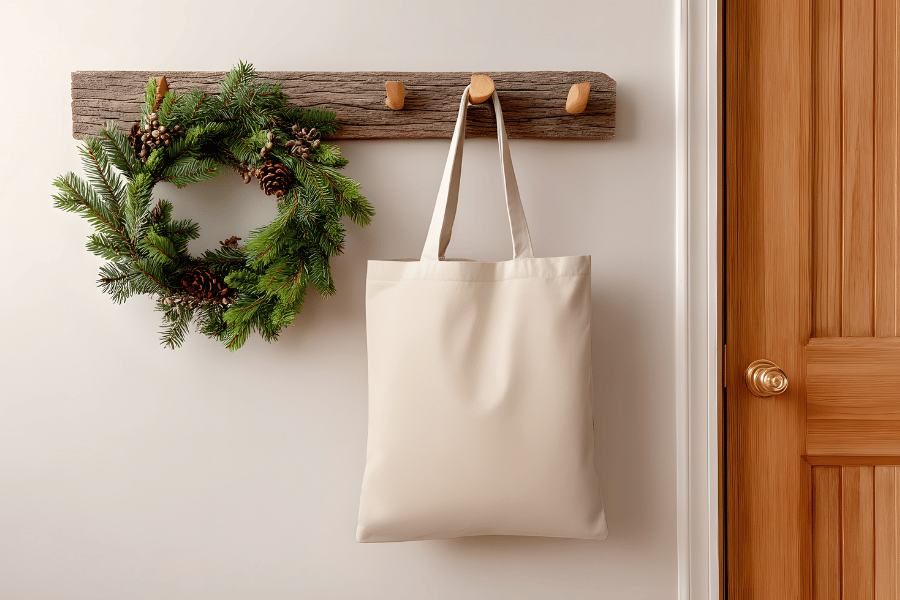
When I moved into my first apartment, there was nowhere to hang coats. So I grabbed a scrap board, screwed in some hooks, and suddenly I had a coat rack. Simple but game-changing.
This project teaches you mounting techniques, spacing for functionality, and basic finishing. It’s also a chance to get creative with design—you can use rustic wood, modern hooks, or even carve patterns into the backboard.
Make sure you screw into wall studs or use wall anchors when mounting the rack. You don’t want the weight of that winter coat ripping it out of the wall.
11. Step Stool
Quick Steps:
- Cut two back legs and 4 front legs.
- Cut top platform and lower step.
- Assemble with glue and screws.
- Sand all corners and edges round.
- Apply durable finish (polyurethane).
A step stool is both practical and a great beginner challenge. My first one collapsed—yep, I glued it and unclamped too soon. That taught me patience and the importance of joinery strength.
This project introduces you to angled cuts, stability, and reinforcing weight-bearing joints. You’ll also gain confidence in building something you can actually stand on.
When you finally step on the stool without it wobbling, you’ll feel an incredible sense of accomplishment.
Cut your 2 back legs and two of your front legs to the same height. Put a slight angle on top–maybe 15 degrees or so. The top platform will mount to these 4 legs.
Cut a board to brace between the two back legs and a matching one for the two long front legs. This front-leg brace will also serve as a rest for the front step. Cut two front legs at a height matching the top of the front brace (ie. measure the distance from the top brace to the floor and cut the two front legs that measurement).
Attach the two short legs to the front corners of the step and set the step on the front brace. Glue & screw everything together.
12. Rustic Sign or Flag
Quick Steps:
- Gather boards or pallet wood.
- Cut to equal length and join side-by-side.
- Secure with back braces.
- Sand lightly, leaving rustic texture.
- Add paint, stencil, or wood-burned design.
- Seal with clear coat for longevity.

Rustic signs and flags are perfect for creativity. I once built a wooden American flag out of pine strips and torched the surface for a weathered look. It turned out great.
These projects let you practice sanding, staining, and even decorative techniques like wood burning or stenciling. They’re also inexpensive—you can make one from pallet wood or leftover boards.
The best part? Signs and flags make amazing gifts. Personalized décor has value far beyond the cost of materials.
Build, Learn, Repeat
From cutting boards to rustic signs, these easy woodworking projects for beginners are more than just crafts. They’re stepping stones into a lifelong hobby. You’ll make mistakes (everyone does), but each project teaches you something new.
So pick one, grab your tools, and start building. Who knows? That first little cutting board might be the start of a woodworking passion that lasts decades.
That’s the beauty of beginner projects—perfection isn’t required. Each project on this list teaches you one or two key woodworking skills without overwhelming you. For example, a cutting board teaches clamping and sanding. A picture frame teaches precise measuring. A planter box introduces outdoor finishes. By the time you work through all 12, you’ll have a skill set that sets you up for bigger furniture builds.
Tips to Avoid Common Beginner Mistakes
- Measure twice, cut once (yes, cliché, but it’s true).
- Sand progressively—start with 80-grit, move to 120-grit, and finish with 220-grit.
- Don’t rush the glue drying time.
- Practice cuts on scrap wood before the real thing.
- Finish with clear coat or oil to protect your hard work.
One mistake I made early on: staining pine. Big regret. I thought a dark stain would make my aquarium stand look fancy, but instead it looked like zebra stripes. Lesson? Know your wood. Some species don’t take stain well.
The good news is, mistakes are part of the process. Keep some scrap wood handy to test stains, cuts, and finishes before committing to your actual project.
Conclusion – Build, Learn, Repeat
Easy woodworking projects for beginners aren’t just about creating something useful—they’re about building skills, confidence, and memories. Every project you finish (even the wobbly ones) adds to your toolkit of experience. Don’t be afraid of mistakes; they’re proof you’re learning.
So grab a saw, pick a project, and start building today. You’ll be surprised how quickly “beginner” projects turn into lifelong woodworking passion.
Frequently Asked Questions
Q: What is the easiest woodworking project for beginners?
A cutting board is the easiest project—simple tools, glue, sanding, and finishing.
Q: What tools do I need for beginner woodworking projects?
Basic tools: saw, drill, clamps, sander, safety gear.
Q: Can I start woodworking without a workshop?
Yes! Many projects can be built on a patio, garage, or even a sturdy table.
Q: How much does it cost to start woodworking?
Beginner projects often cost under $50 in tools and materials if you start small.
Q: What wood is best for easy woodworking projects?
Pine, poplar, and cedar are affordable, forgiving, and great for practice.